Pleated window shades are a key feature in many RVs, offering a combination of functionality and style. However, like most things in an RV, they’re not immune to wear and tear. Over time, the cords that allow these shades to move smoothly can fray or break, leaving you with shades that won’t operate properly. The good news? You don’t need to replace the entire shade! Restringing your pleated RV window shades is a cost-effective and surprisingly simple DIY project.
In this blog, we’ll walk you through the entire process of restringing your RV shades step by step. With just a few tools and a little patience, you’ll have your shades working like new in no time. Let’s dive in!
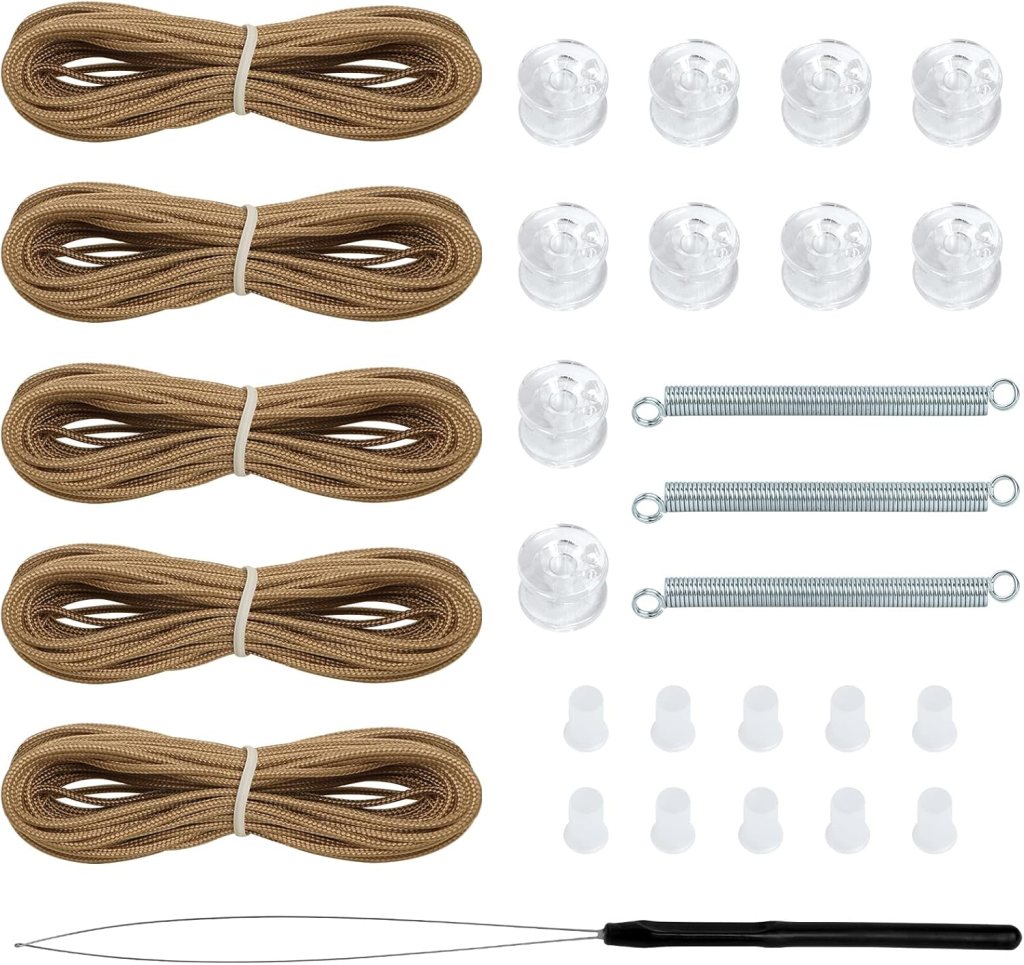
Tools and Materials Needed:
- Replacement cord (nylon is recommended for durability)
- Scissors
- Measuring tape
- Needle or restringing tool
- Lighter (to seal cord ends)
- Screwdriver (to remove and reattach the shades)
- Masking tape or clips (to hold the pleats in place)
- A restringing kit. You can purchase these kits on Amazon, for added convenience here is a reliable choice: the NOVINO RV Blinds Repair Kit, which includes everything you need for this project.
Amazon affiliate link
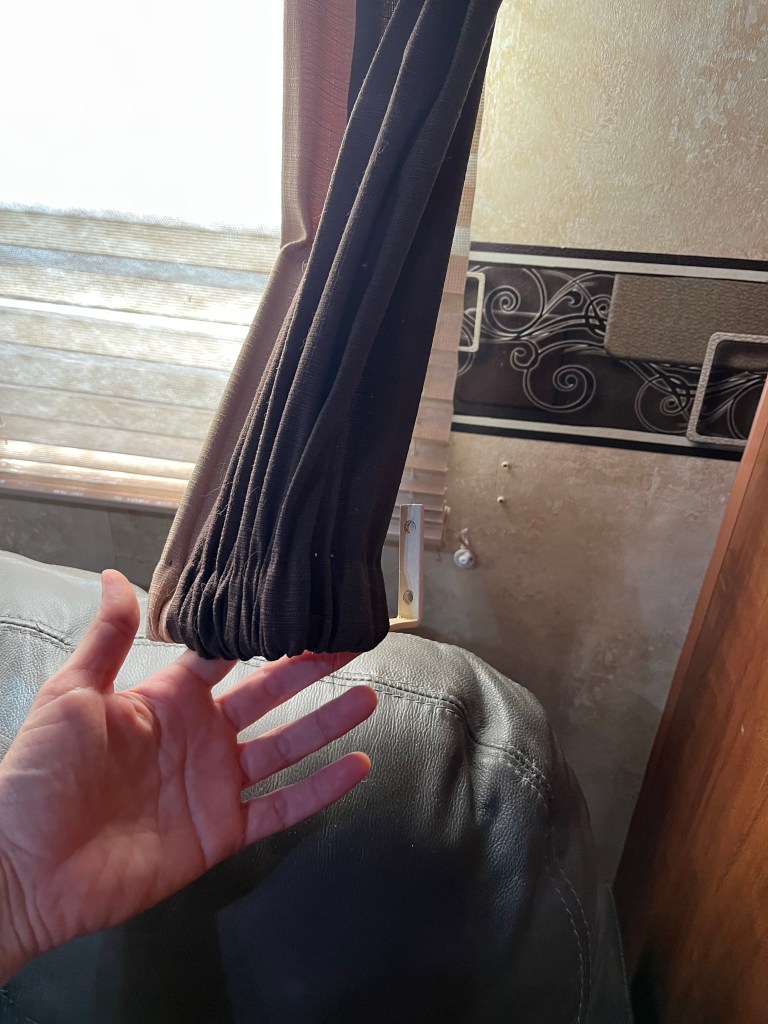
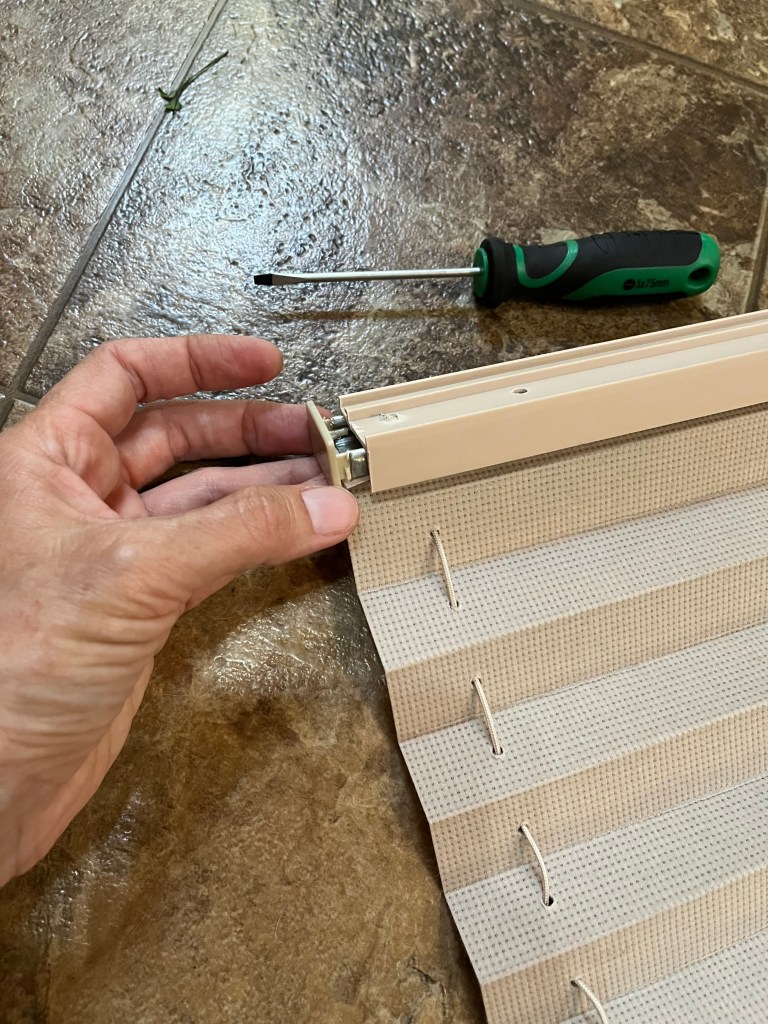
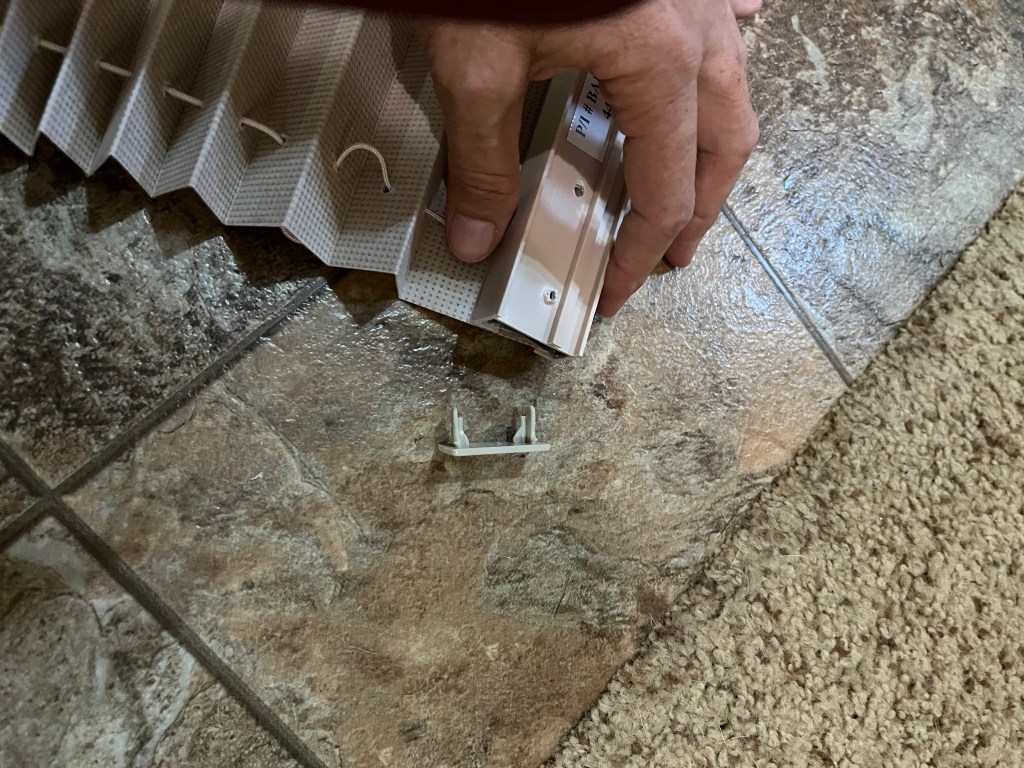
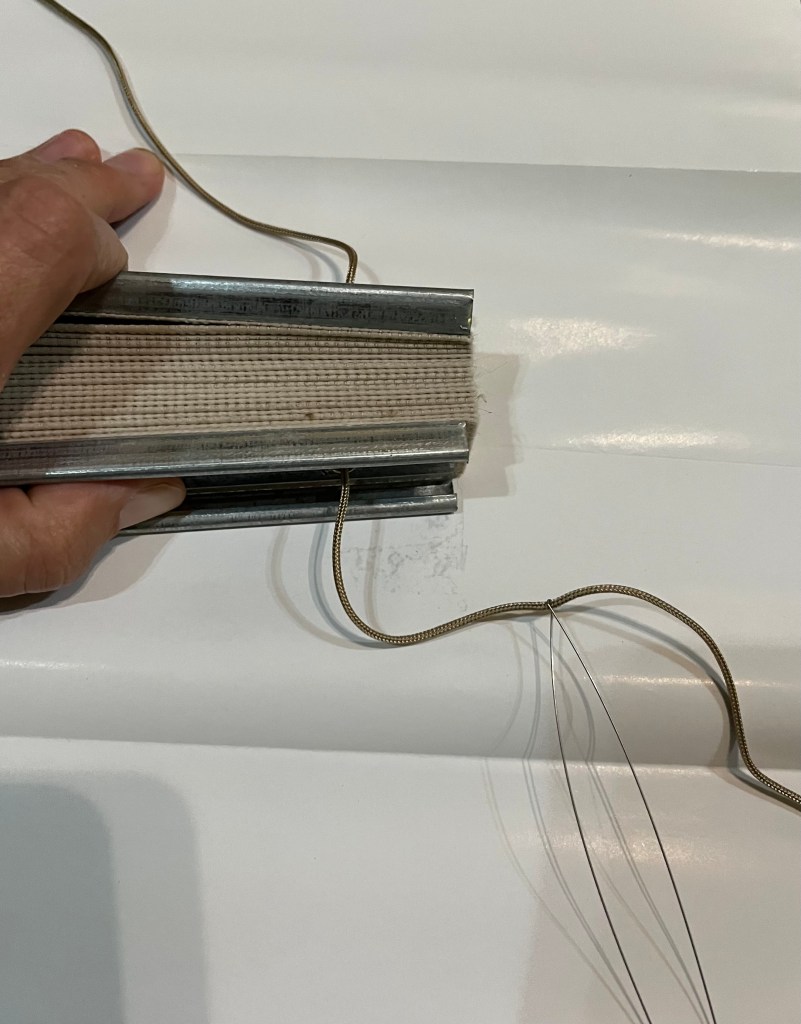
Step 1: Remove the Shades
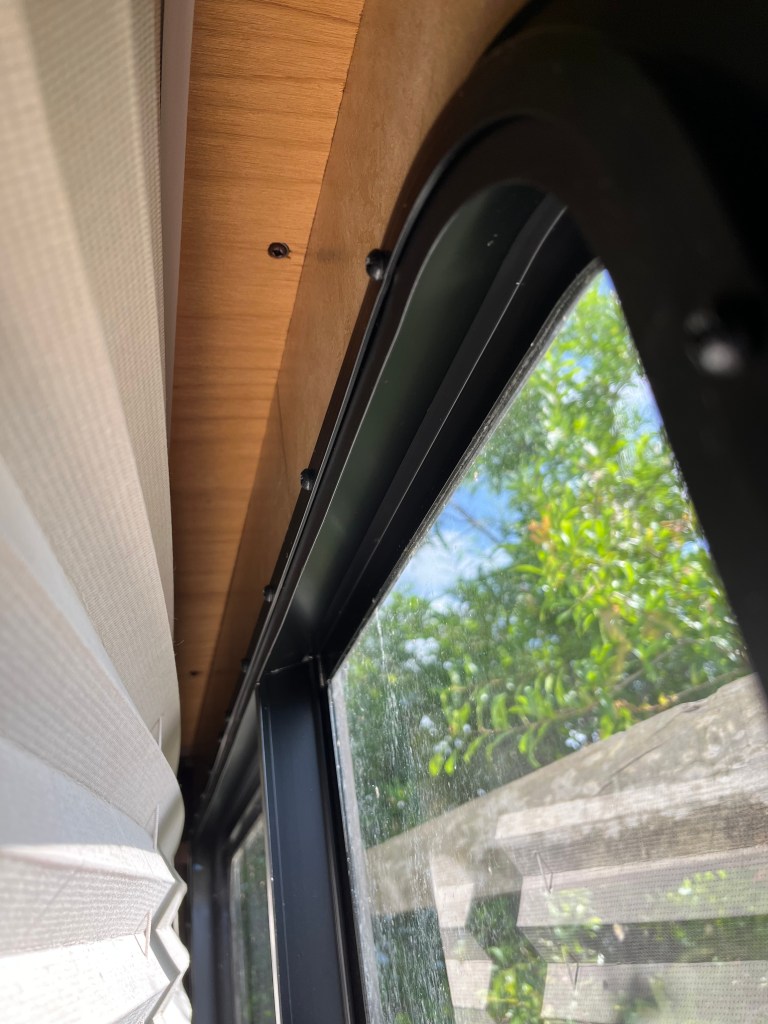
- Detach the shades from the window frame. Use a screwdriver to carefully unscrew the mounting brackets holding the shade. Be sure to keep the screws and brackets in a safe place for reinstallation later.
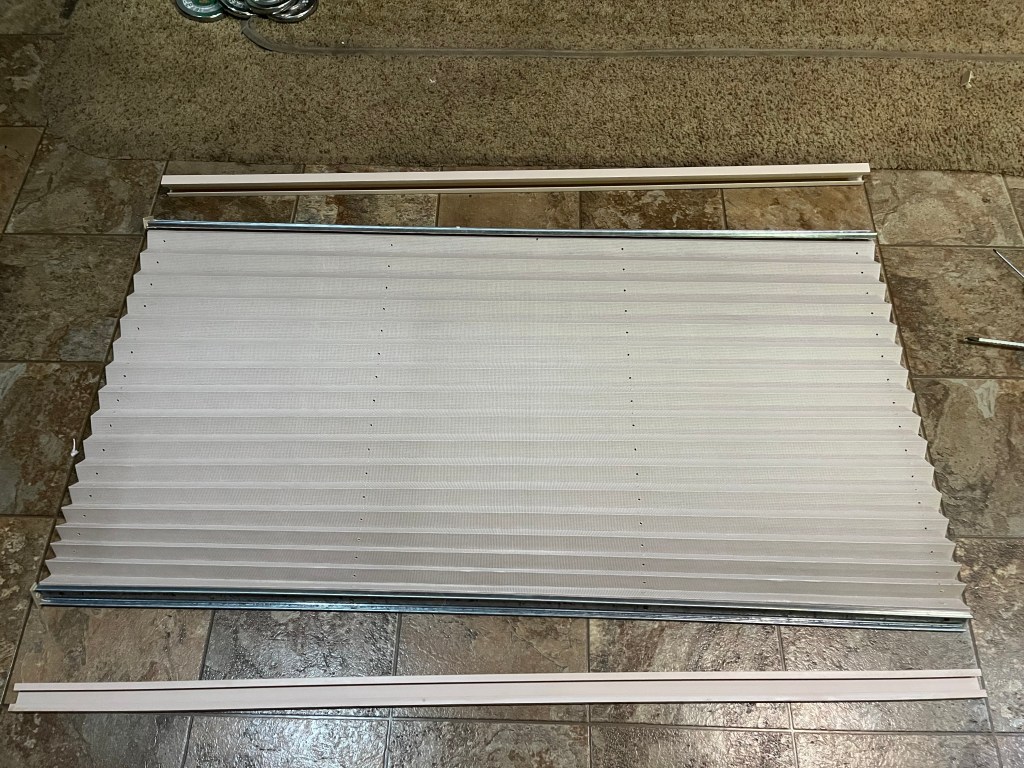
- Lay the shade on a flat, clean surface. This will give you enough room to work comfortably and ensure the pleats stay intact.


Step 2: Inspect and Measure
- Examine the shade’s condition. Inspect the cords closely to identify where they are worn, frayed, or broken. If the pleats or cord guides are damaged, you may need to replace additional parts.
- Measure the replacement cord. Use the old cord as a reference. If it’s unavailable, measure the height and width of the shade. Multiply the height by 4 and add the width to determine the length of each cord you’ll need. Cut the cords to size, ensuring a little extra length for adjustments.
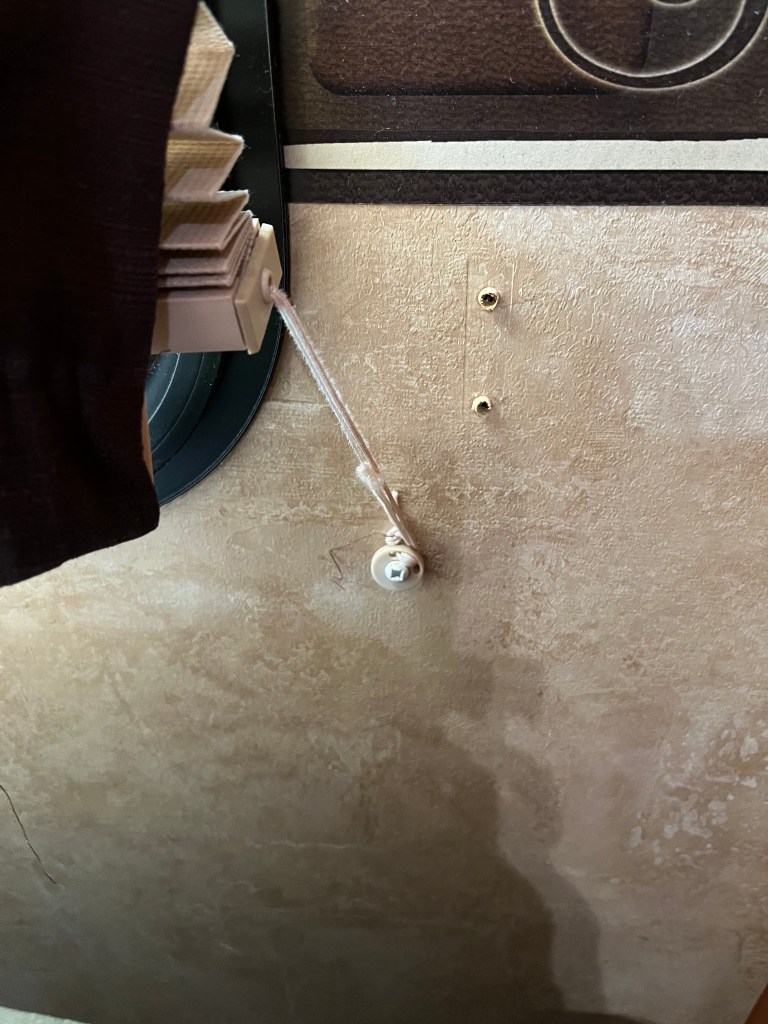
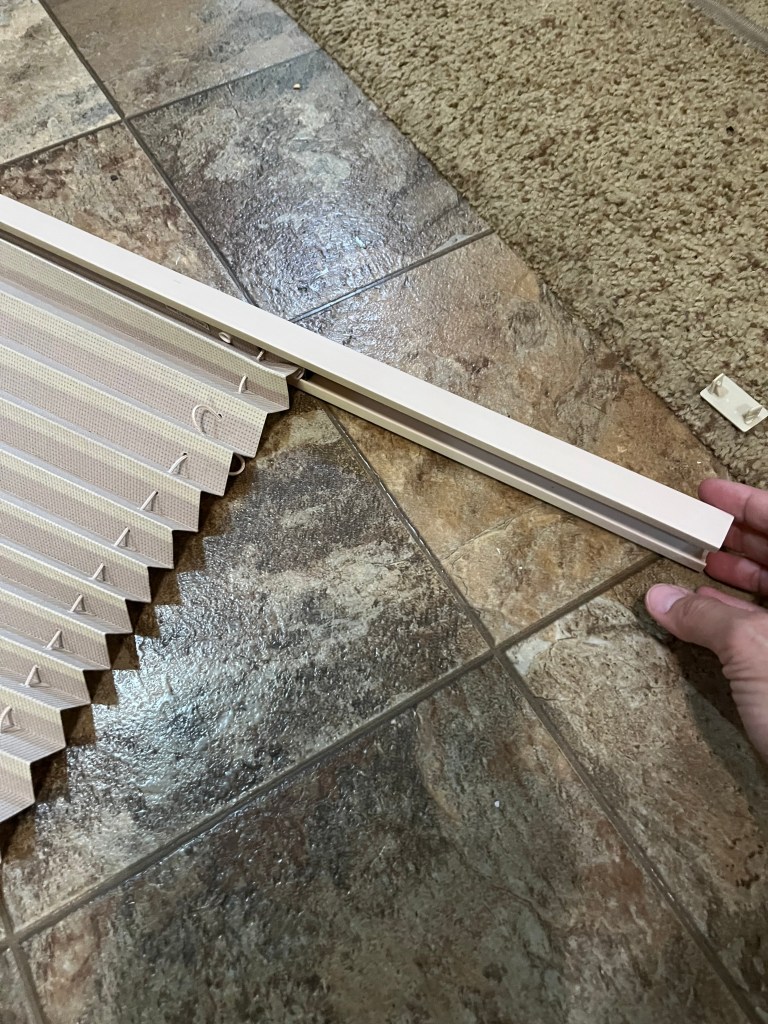
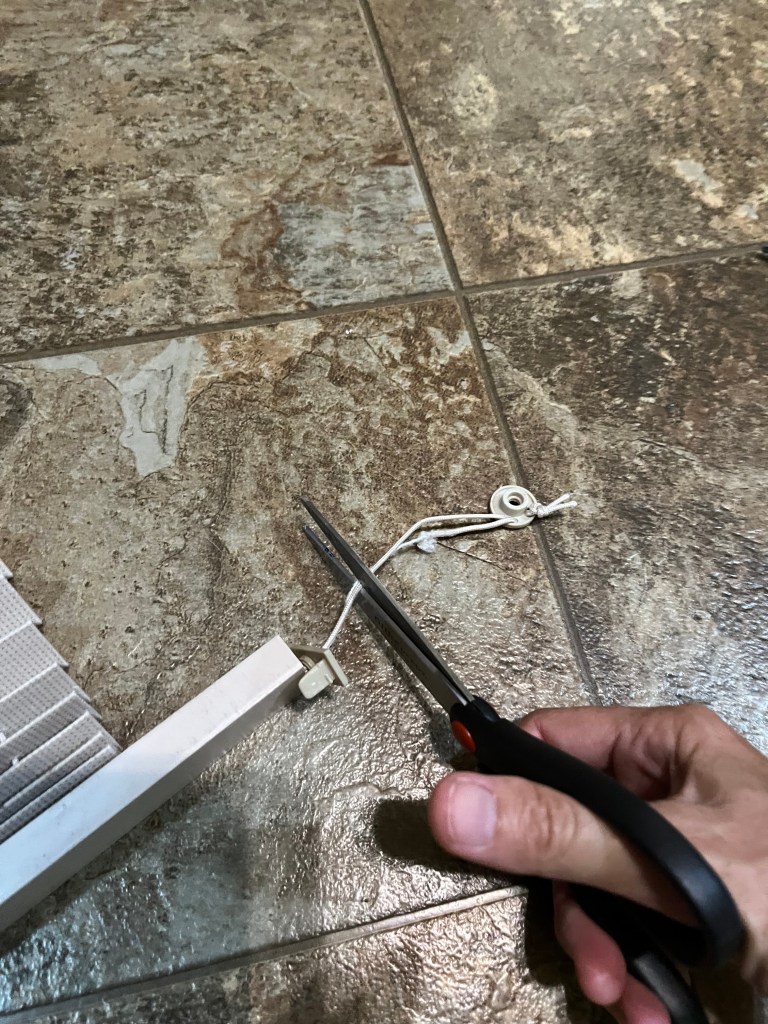
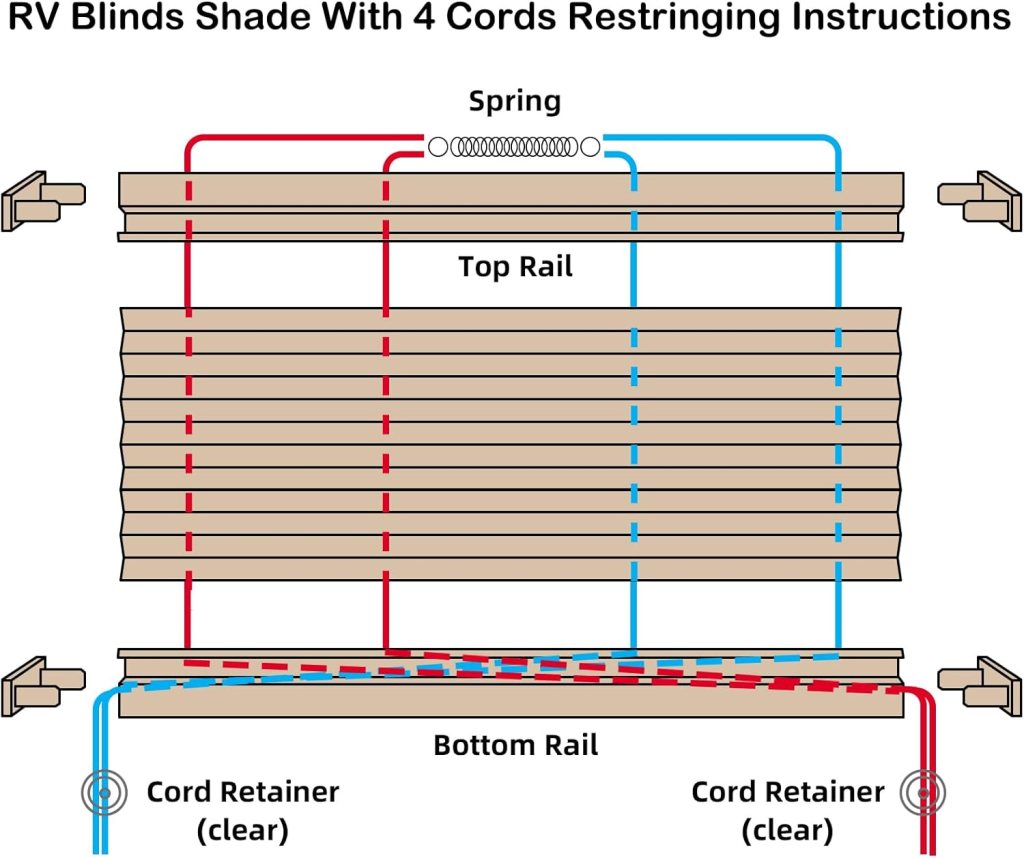
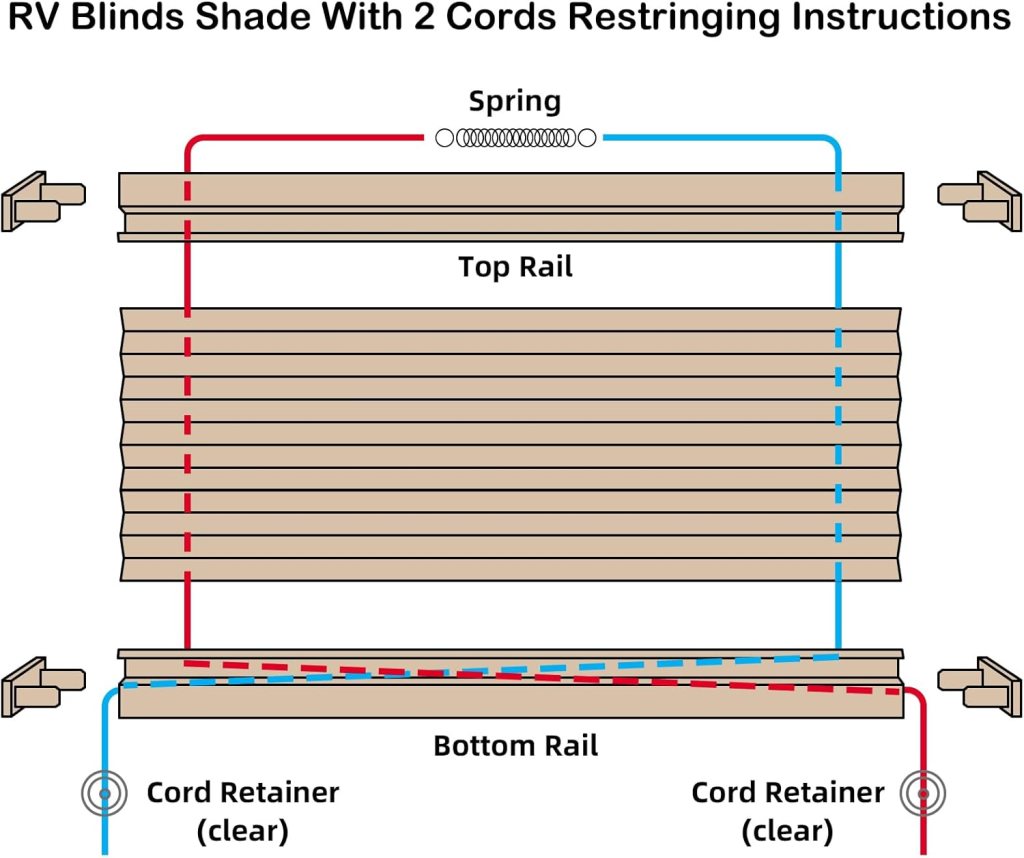
Step 3: Remove the Old Cord
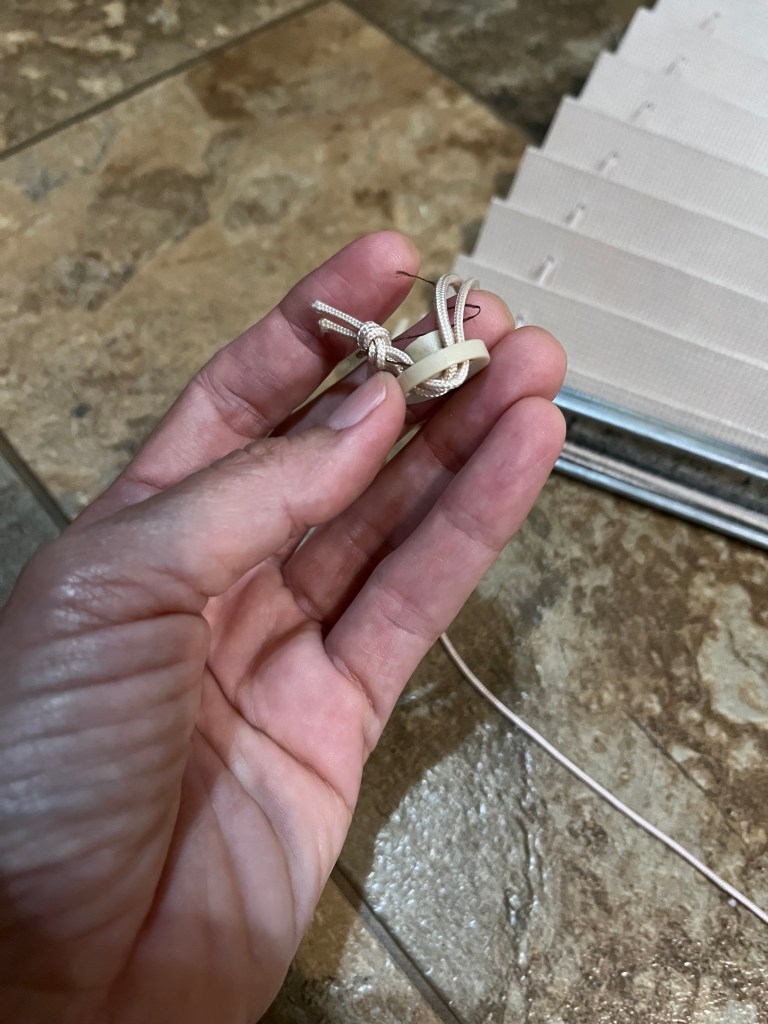
- Locate the ends of the old cord, which are usually knotted or attached to a tensioner. Carefully untie or cut the knots to free the cord.
- Gently pull the cord out of the cord guides and pleats. Take note of the threading pattern as you go; you can also take pictures to use as a reference when restringing.
Step 4: Thread the New Cord
- Prepare your workspace. Secure the pleats in place using masking tape or clips to prevent them from shifting during the threading process.
- Start with one pleat at a time. Insert the new cord through the first pleat using a needle or restringing tool. Be careful not to damage the fabric or the pleats as you work.
- Continue threading the cord through each pleat, following the original pattern. This process can be tedious, but taking your time ensures the cords will function properly.
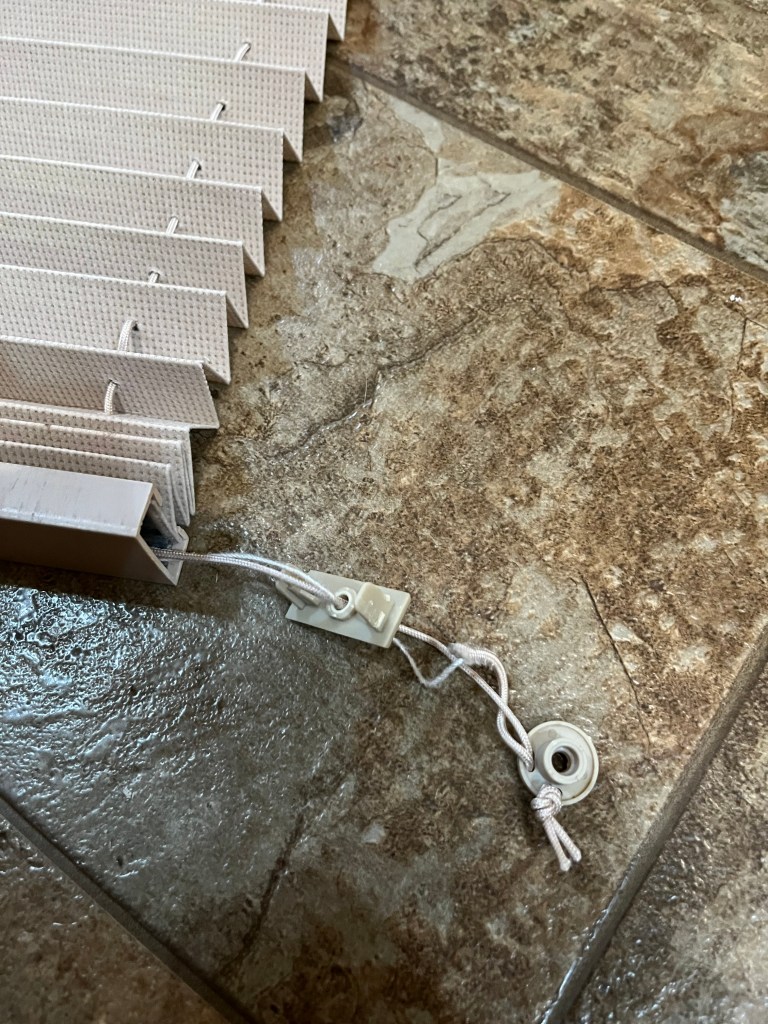
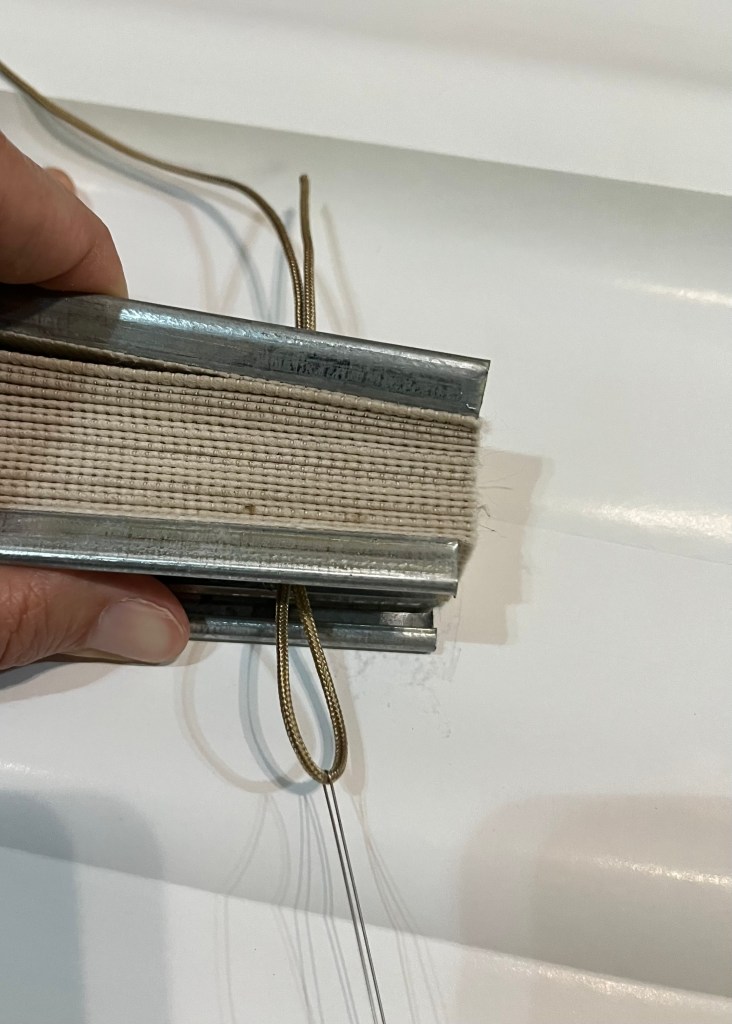
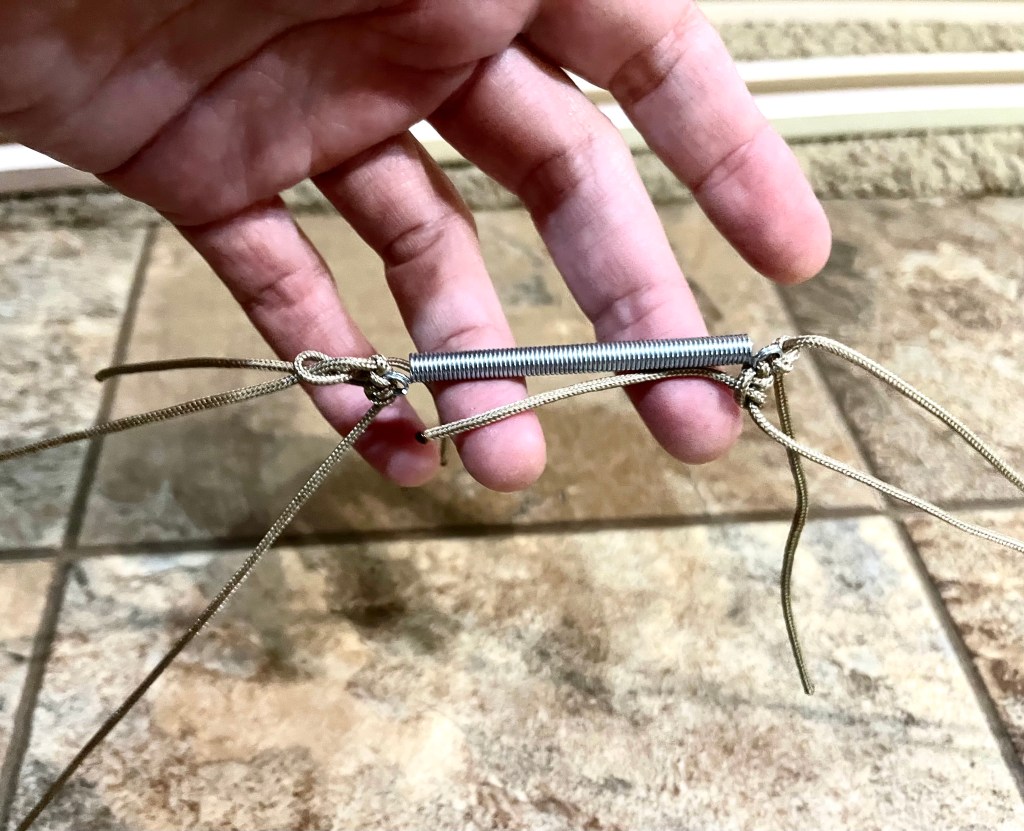
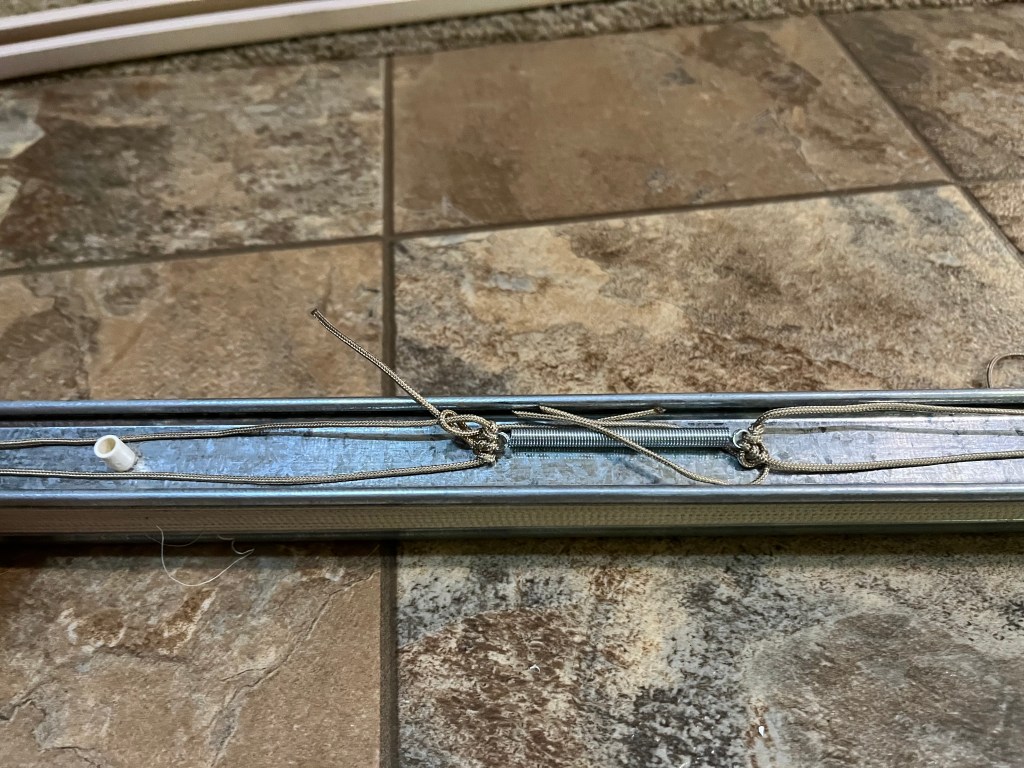
- Once the cords are threaded through all the pleats, guide them into the cord guides and through the tensioners on either side of the shade.

Step 5: Secure and Test the Shade
- Tie knots to secure the cords. Once the cords are threaded and in place, tie a knot at each end to secure them. Make sure the knots are tight enough to hold but not so tight that they can’t be adjusted if needed.
- Reattach the shade to the window frame using the screws and brackets you set aside earlier. Make sure the shade is securely mounted.
- Test the movement of the shade. Raise and lower it several times to ensure the cords are functioning smoothly and evenly. If one side is uneven, adjust the cords by loosening the knots and redistributing the tension.
Step 6: Final Adjustments
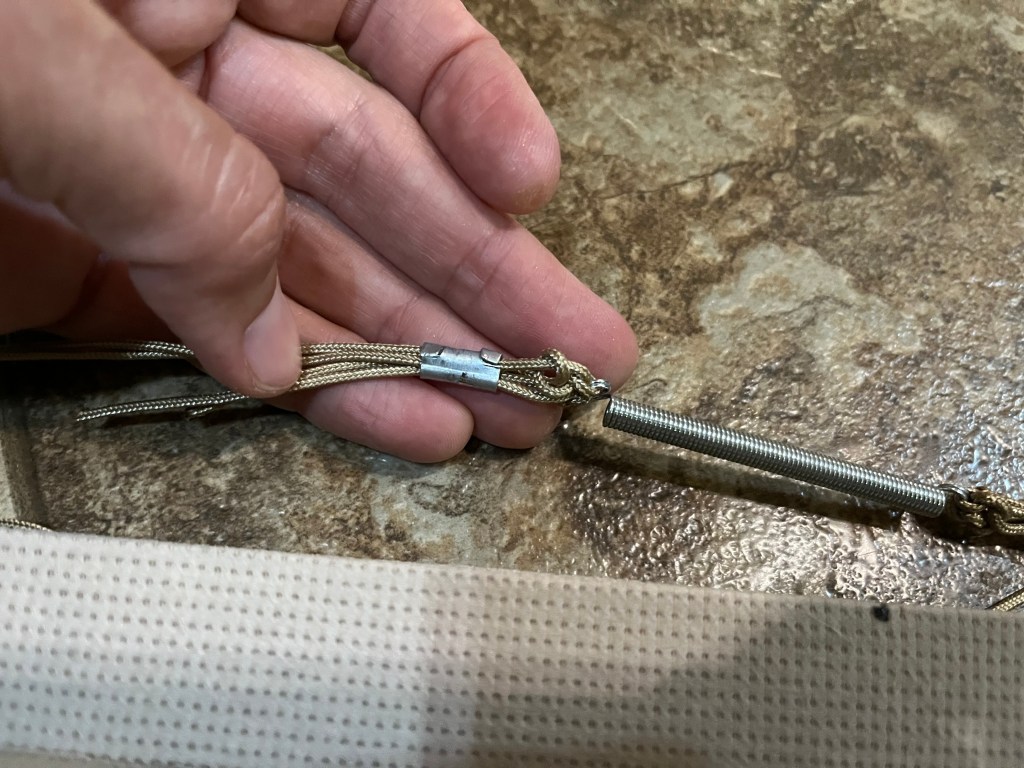
- Trim excess cord. Once you’re satisfied with the tension and movement, use scissors to trim any excess cord. Leave a small amount of extra cord near the knots to allow for future adjustments if necessary.
- Seal the cord ends. Use a lighter to carefully melt the ends of the cords. This prevents fraying and extends the life of the cord.
- Perform a final check to ensure the shade operates smoothly and looks balanced when fully extended or retracted.
Tips for Success:
- Take detailed photos of the shade’s original setup before removing the cords. These will be invaluable as a reference. (THIS IS VERY IMPORTANT – All windows are not the same as this one)
- Work on a large, clean surface to keep the pleats and cords organized throughout the process.
- If you’re restringing multiple shades, work on one at a time to avoid mixing up parts or threading patterns.
Final Thoughts
Restringing RV window shades may sound like a challenging task, but with the right tools, guidance, and a little patience, it’s a rewarding project that saves money and extends the life of your shades. Plus, there’s something deeply satisfying about fixing something with your own hands and learning new skills along the way.
If you’ve enjoyed this guide and found it helpful, we encourage you to share your thoughts in the comments below! Do you have any additional tips or tricks for restringing RV window shades? We’d love to hear about your experience.
For more RV tips and advice, check out our other posts. Happy travels!

The Ultimate Checklist: 15 Must-Have Accessories for Every New RVer Before Hitting the Road
Introduction Starting your RV adventure is one of the most exciting decisions you can make! Whether you’re a weekend warrior or planning a full-time life on the road, having the right gear can make or break your journey. With so many gadgets, tools, and accessories out there, it can feel overwhelming to decide what you…

Top 10 RV Kitchen Gadgets to Make Cooking on the Road Easy
Introduction Cooking in an RV can be a fun adventure, but it also comes with its own set of challenges. Limited space, fewer appliances, and the need to conserve energy and water can make preparing meals a bit tricky. That’s why having the right kitchen gadgets is a total game-changer. With the right tools, you…

RV Maintenance Simplified: Addressing the 10 Most Common Problems
There’s nothing quite like hitting the open road in an RV—freedom, adventure, and the promise of new destinations. But let’s face it, RV life isn’t always smooth sailing. Like any vehicle or home, RVs come with their share of quirks and problems. The good news? Most issues are manageable with a little know-how. To help…

How to Stay Connected on the Road: Internet and Cell Service for RVers
Traveling in an RV is a wonderful way to explore the country, enjoy nature, and live a more flexible lifestyle. But whether you’re a full-time RVer or just taking an extended trip, staying connected to the internet and having reliable cell service is important. Whether it’s for work, keeping in touch with family and friends,…

20 Must-Have Outdoor Accessories for RV Enthusiasts
Introduction Life on the road is all about adventure, freedom, and making the most of the great outdoors. Whether you’re boondocking in the middle of nowhere or relaxing at a well-equipped RV park, having the right outdoor accessories can turn your experience from good to absolutely amazing. From sizzling up meals on a portable grill…

Top RV Bathroom Upgrades for Maximum Comfort and Convenience
When you’re living or traveling in an RV, having a functional and comfortable bathroom can make all the difference. Whether you’re planning a weekend getaway or embarking on a full-time RV journey, upgrading your RV bathroom is a great way to boost convenience, hygiene, and overall enjoyment of your space. Here are some practical and…

Leave a comment